Astrotips
Eyepiece tips
Dew cap
Polar alignment I
Polar alignment II
Mounting a camera I
Mounting a camera II
Hartmann-(Scheiner-)mask
WebCam for astrophotography
LED flashlight
Preview
Eyepiece tips
For a long time I thought that only an eyepiece with a long focal length could have a
large field of view. In fact the field of view depends only secondary on the focal length
but primary on the diameter of the field aperture.
For selecting the focal length of an eyepiece there is an upper and a lower limit,
depending on the size of the exit pupil. For the longest focal length of the eyepiece
the exit pupil should not be larger than your own pupil diameter in darkness (normally
about 6 mm), for the shortest the exit pupil should not be smaller than 0.7 mm. For the
calculation you could use the following formula:
f max = F / D * 6
f min = F / D * 0.7
D = diameter of the telescopes objective, F = focal length of the telescope
With the maximum focal length you get most out of your telescopes light gathering power.
If the exit pupil is bigger than your own pupil, this is equivalent to a reduction of
your telescopes objective diameter. If the exit pupil is smaller than 0.7 mm,
the objects seems to be bigger but there are no more details visible. It is called
"empty magnification". For the max. focal length of the eyepiece there
could be two borderline cases:
a) The calculated value is more than 40 mm. Such a long focal length is not easy
to get and mostly as 2"-version. The upper limit for 1.25"-eyepieces
is normally 40 mm, but they mostly have less good viewing comfort.
b) The calculated value is less than 30 mm. With standard Ploessl-eyepieces
you can not get the maximum field of view. For this case you should use
widefield eyepieces.
For the eyepiece with the longest focal length you should know:
a) The focal length should correspond to the above formula.
b) Maximum field of view with max. diameter of the field aperture (about 28 mm
for 1.25", about 47 mm for 2").
For the eyepiece with the minimum focal length there only should be a good
viewing comfort. It is a problem for eyepieces with less than 10 mm focal length,
because the distance of the eye to the lenses is very close. For this case you
should use eyepieces with long eye relieve (Vixen LV, TeleVue Radian, Pentax XL,
...).
Between the eyepiece with the longest and the shortest focal length you should
choose 2 or 3 more with more than half of the focal length of the previous
(e.g. telescope 200/1000: 30 mm, 18 mm, 12 mm, 7 mm, 4 mm). An alternative
is the use of a barlow lense, wich is mounted between diagonal and eyepiece
and so increases the focal length of the telescope (mostly by factor 2).
The (mostly overrated) magnification of the telescope is calculated as
follows:
V = F / f
F = focal length of the telescope, f = focal length
of the eyepiece
I myself love minimalistic eyepieces: No widefields, no barlows, construction
as simple as possible. Therefore a good Ploessl or the excellent Baader
Eudiascopic. If possible I even avoid the diagonal.
For further calculations of eyepiece and other telescopic parameters
you could use "Telescope calculator" at
Software.
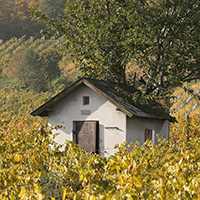
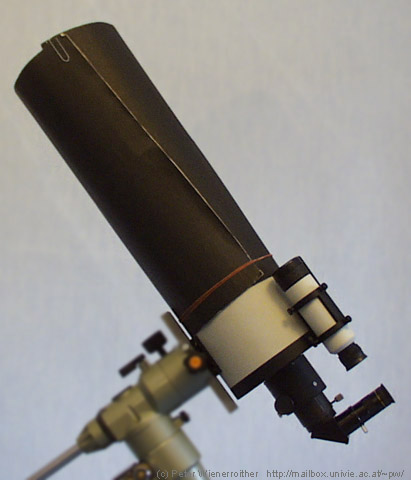
Cheep dew cap from corrugated board photo
Everyone who has a closed telescope like a Schmidt-Cassegrain or even a refractor
knows the problem with dew. At temperatures below 10°C and high humidity the
front lense or the corrector plate respectively steams up in short time. The most
effective solution is the (complicate) heating of the front lense. A more simple
solution is a dew cap. For nearly every telescope you can get a dew cap optional.
Mostly it's from metal, heavy, bulky and expensive. And metal attracts dew -
especially at the outside. I found the most simple, less expensive and very effective
dew cap in a roll of black corrugated board. On the tubes side I fix it with some
rubber bands, on the open side with a paper clip. The ideal length is the single
to double diameter of the telescopes tube. After use you can roll it up saving space.
If it is destroyed you can buy a new one for few money. Until now I had no problems
with dew even under bad conditiones and additional it protects from stray light.
Polar aligning the mount - I (by PW) photo
For visual observations normally a rough alignment of the mount to the celestial
northpole will do. Just align the rectascension axis to Polaris, as described in
most user manuals. For high magnification and especially for photography you should
do a more precise alignment. Of course you could correct a insufficient polar
alignment with the telescopes hand controller but not the resulting field rotation.
For the following method you need a polar finder, which you can get at least optional
for nearly every mount. Mounts from Vixen and compatibles have even a circle for the
position of Polaris and a cross for the true position of the celestial northpole. The
problem is, in which direction from Polaris lies the true pole? Vixens user manual
describes a method by using the rectascension circles, but which needs some calculations
and the knowledge of your geographical position. But the celestial northpole lies nearly
exact on the line from Polaris to Beta UMi (see red line on the
photo). My method works as follows: Align Polaris
to the middle of the polar finder (you must not level the tripod exactly horizontal)
and rotate the rectascension axis until the counterweight axis is parallel to the
line from Polaris to Beta UMi (see
photo). Now use
the screws on the mount to position Polaris exactly in the middle of the circle in the
polar finder (or more precisely to the position 11 o'clock relating to the cross
directly on the circle). Ready. For this method you must have a exactly aligned polar
finder (see manual). This method of polar alignment is good enough for photos with
lenses up to 1000 mm focal length. A more precise method is the Scheiner-method that can
be found below. I make polar alignment after completely seting up the mount, telescope
and accessories, because otherwise it is risky to deajust the equipment by pushing on
it.
Polar aligning the mount - II (by Scheiner)
coming soon ...
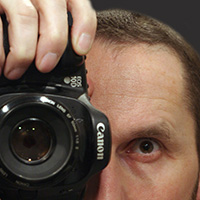
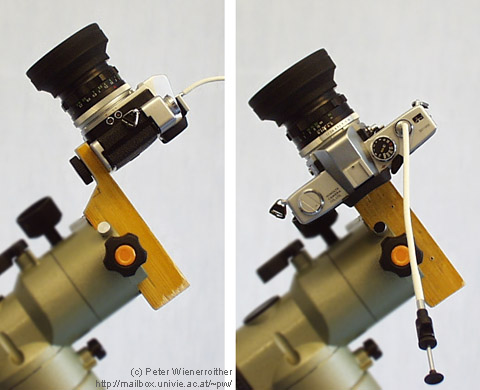
Mounting a camera on the mount - I photo
For photographing star fields you normally use a camera with wide-angle, normal or
telephoto lense, mount it on the telescope or on the mount and take guided photos
with exposure times of several minutes. For focal length up to 135 mm and exposure
times up to about 15 minutes it is not necessary to control the guiding, as long
as the pole positioning is done accurately (see chapter
polar alignment).
The most simple way to mount the camera is a piece of wood with square
cross-section, that fits in the dovetail slot of the mount. The square
cross-section makes it easy to change between landscape and portrait format
(see photo). Additional you need also a photo-tripod-screw. Of course you should
control the guiding, at least to find out if the batteries for the mount are
giving enough power. But above method is just simple, cheap and effective. The
rubber lens hood you can see on the photo is a good (and necessary) dew protection.
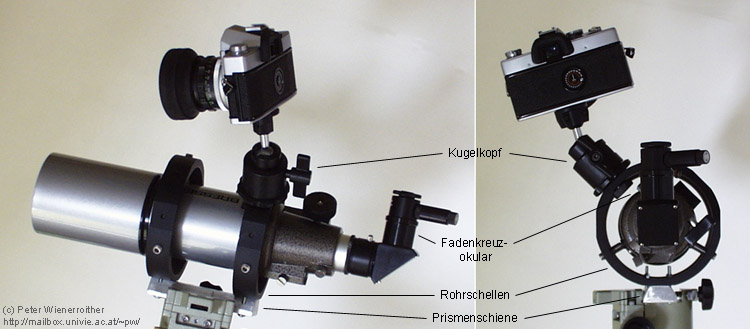
Mounting a camera on the mount - II (V2.0) photo
Above method of mounting the camera onto the mount has the disadvantage of no control
of the guiding but this is absolutly necessary for lenses with a focal length of 135 mm
and more and you also should do that for shorter focal length. And with above
method you could turn the field of view only by 90°. Therefore I build a device
that carries the camera and the telescope at the same time. You need the following
materials:
- A piece of aluminium to file the dovetail plate or a ready made part.
- (Guide scope) tube rings (e.g. Baader).
- A guiding scope with (illuminated) crosshair eyepiece (e.g. Baader/Celestron Microguide
12.5 mm - this has additional concentric circles with defined diameters and with a
formula to calculate the necessary accuracy for guiding (e.g. with 135 mm focal length
for photography and 400 mm focal length for guiding the guiding star must stay within
the second circle).
- Photo ball head for better alignment of the camera (you also could mount the camera
directly to the tube rings) as well as a photo tripod screw with fitting length for
the ball head or the camera respectively.
The whole equipment should be well balanced relating to the dovetail plate.
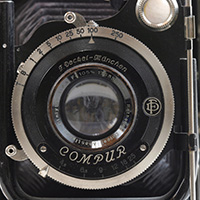
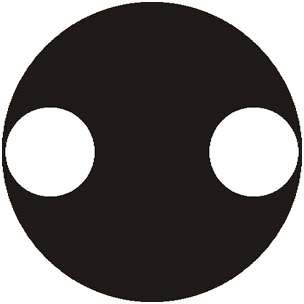
Hartmann-(Scheiner-)mask for focusing astrophotos picture
At astrophotography with long focal length or through the telescope - especially
with the popular, older, mechanical cameras - it is very difficult to focus,
because the focus screens are rough and dark. With changeable focus screens you
have alternatives, also you could make use of the very exact "knife-edge-method"
or other equipments for focusing, but they all have the disadvantage that you
must control the sharpness at the filmplane and therefore you must open the
camera before you take the photo. Not quite as exact but much more simple is
the Hartmann- or Scheiner-mask. Cut out a disc from a piece of (black) cardboard
as shown on the drawing with the diameter of the telescopes tube and two (or three)
holes. The diameter of the holes should be 1/3 to 1/4 of the telescopes lense diameter
for refractors and 1/3 to 1/4 of the telescopes lense diameter minus the diameter
of the secondary for reflectors (the holes should not "touch" the
secondary). You must find a compromise between holes as big as possible and
as far away from each other as possible. Now fix the mask in front of the
telescopes lense and aim at a not too bright and not too dark star. Now
you should see two (or three) stars in the cameras viewfinder or the eyepiece
respectively. If you focus, the stars move together. If you could see only a single
star, you reached the optimum focus.
Attention: Don't forget to remove the
mask befor you take the photo!!!
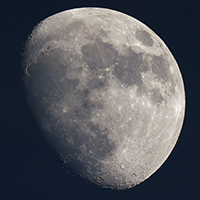
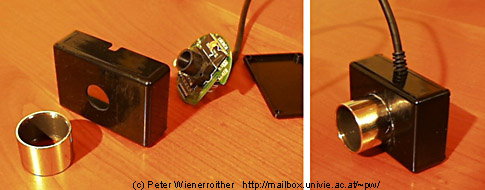
WebCam for astrophotography photo
In the internet I read something about modifying webcams for astrophotography.
As my results on photographing the planets and the moon with standard SLR-camera
and eyepiece projection were not satisfying (problems with focusing, exact
exposure time, some shots are needed for eleminating turbulences, ...)
I bought a Logitech QuickCam VC parallel. The parallel version was not easy
to get but I needed it because my notebook-computer does not have an
USB-interface. I did the modification as follows: You could open the body
with a paper clip inserting in the little holes of the body. Then you are
able to separate the two halfs. Then you must remove the lens and the
IR-filter (green film), the lens-holder can be left on the plate because
it is a good distance device. At e.g. Conrad-Electronic you can find
cases of plastic of different sizes. Chose one, where the plate fits.
Then drill a hole in the case, big enough for the case of the lense and
one for the wire. Then paste the case of the lense with the circuit board to
the inner side of the case and screw up the lid. Finally paste the
1.25" tube of an old eyepiece to the case (you also could use a
1.25" water pipe, also available with flange). Ready. Attention:
Be very careful not to damage the electronic components on the circuit board,
don't even touch it (because of electrostatics).
Some tips for taking photos with the webcam:
- Deep sky photos of nebulas, galaxies etc. are not possible because of the short
exposure times. Bright clusters (Pleiades, etc.) can be tried.
Never take photos of the sun without a special solar filter.
- For focussing you should use an eyepiece which is parfocal with the camera or
produce a distance ring for the eyepiece, i.e. focus the webcam at daylight on
a far distanced object and measure the length of the focuser. Then remove the
webcam and replace it by a 5 mm Ploessl eypiece (this has a field of view corresponding
to the QuickCam VC), focus and measure the length of the focuser once again. The
difference of the two meassurements is the lenght of the ring. With ring and eyepiece
you could search and position the object in the telescope, then remove ring and
eyepiece by the webcam, make a precise focusing and take your photos or movie.
- Always use the webcam directly on the telescope, never with diagonal. Barlows
and eyepieceprojection only with very good optics.
- Experiment with brightness, contrast and exposure times to get the best possible
results.
- Always take many photos. For one good photo you have to take a min. of ten shots.
Later you choose the best images and add them to get a even better result (for
adding I use the software
Giotto).
You could increase the image quality by subtracting a dark frame (take a photo
in an area with no stars or with the cover on your scope and the same parameters
as the photos).
My photos with the webcam can be found at
Astrophotogallery
(mainly planets and moon).
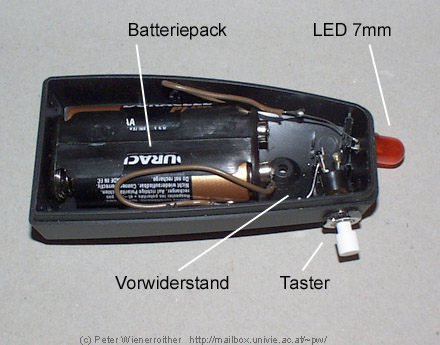
LED flashlight photo
Translation is coming soon. Look at the
german page.
*
More tips for the hobby astronomy can be found here
soon.
- Enhancement of CCD-photos
- General tips for astrophotography
- Diffuser for astrophotography


